Tagging
Tagging is one of the most important areas of a digital asset management or image management system. Therefore this section is rather large. It begins with the simpler but less efficient tagging of single images, doing so to provide the basics quickly. Following that, tagging many images at once is covered.
Single Images
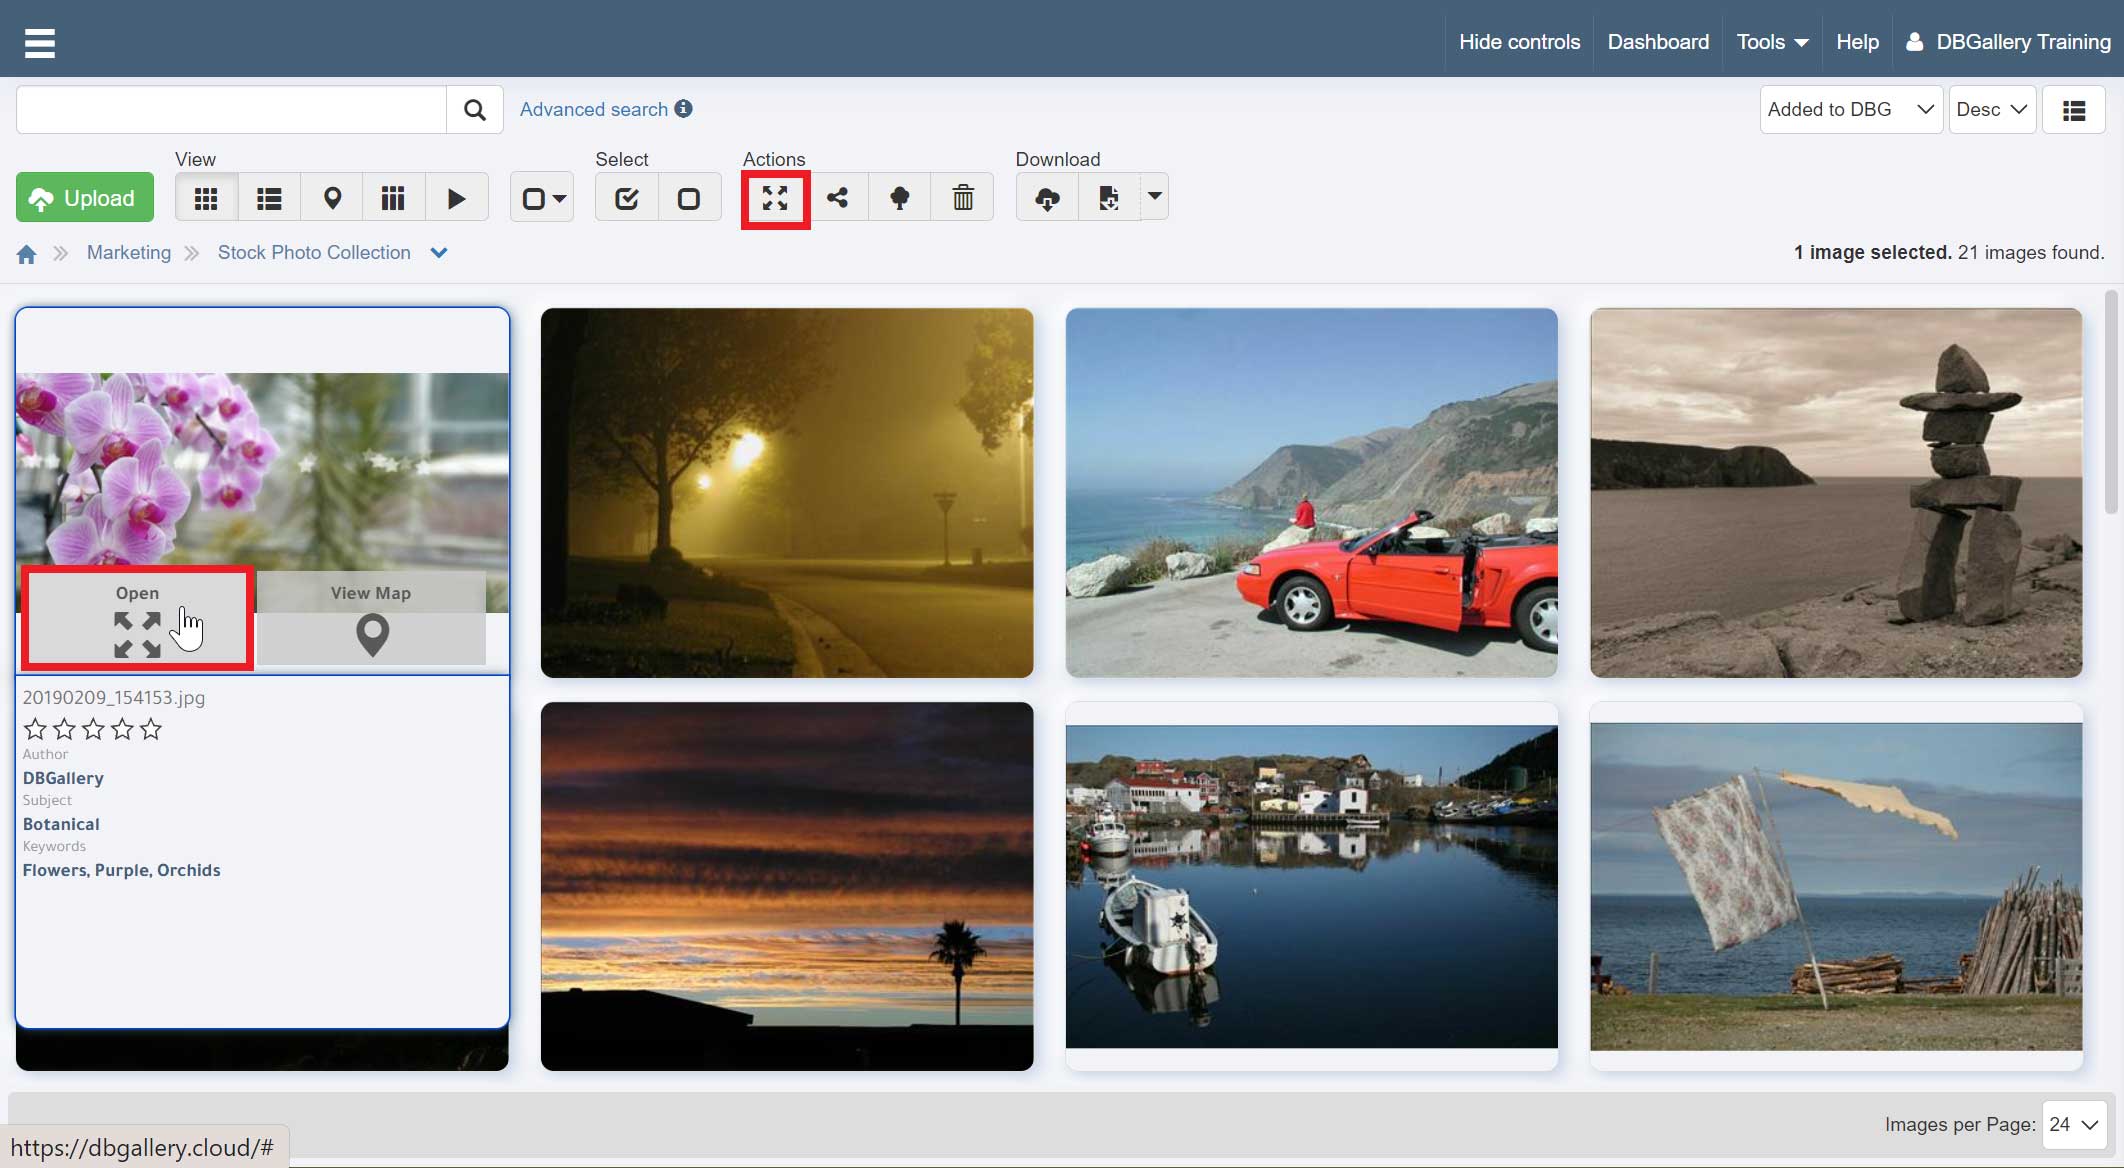
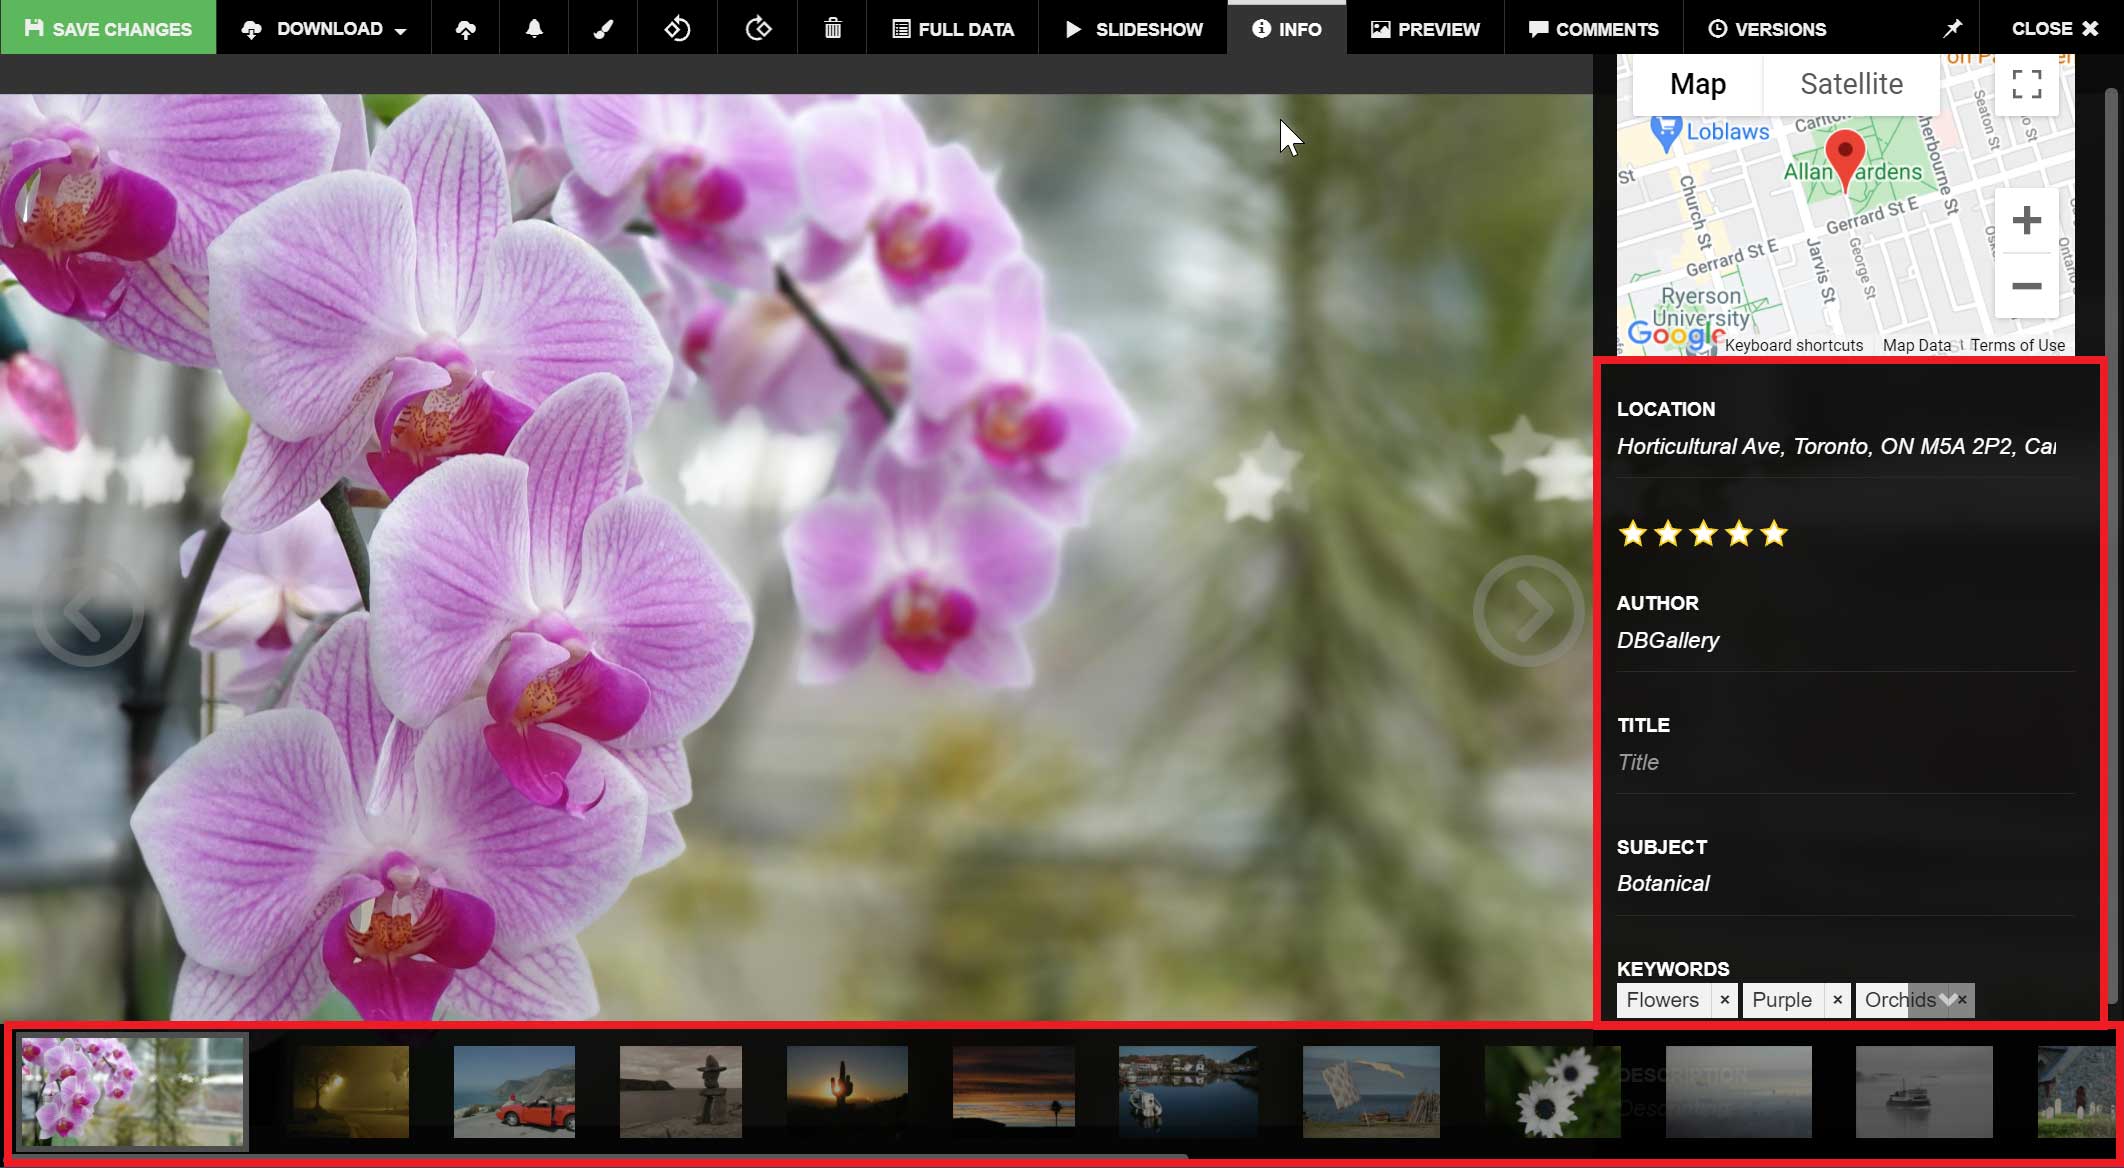
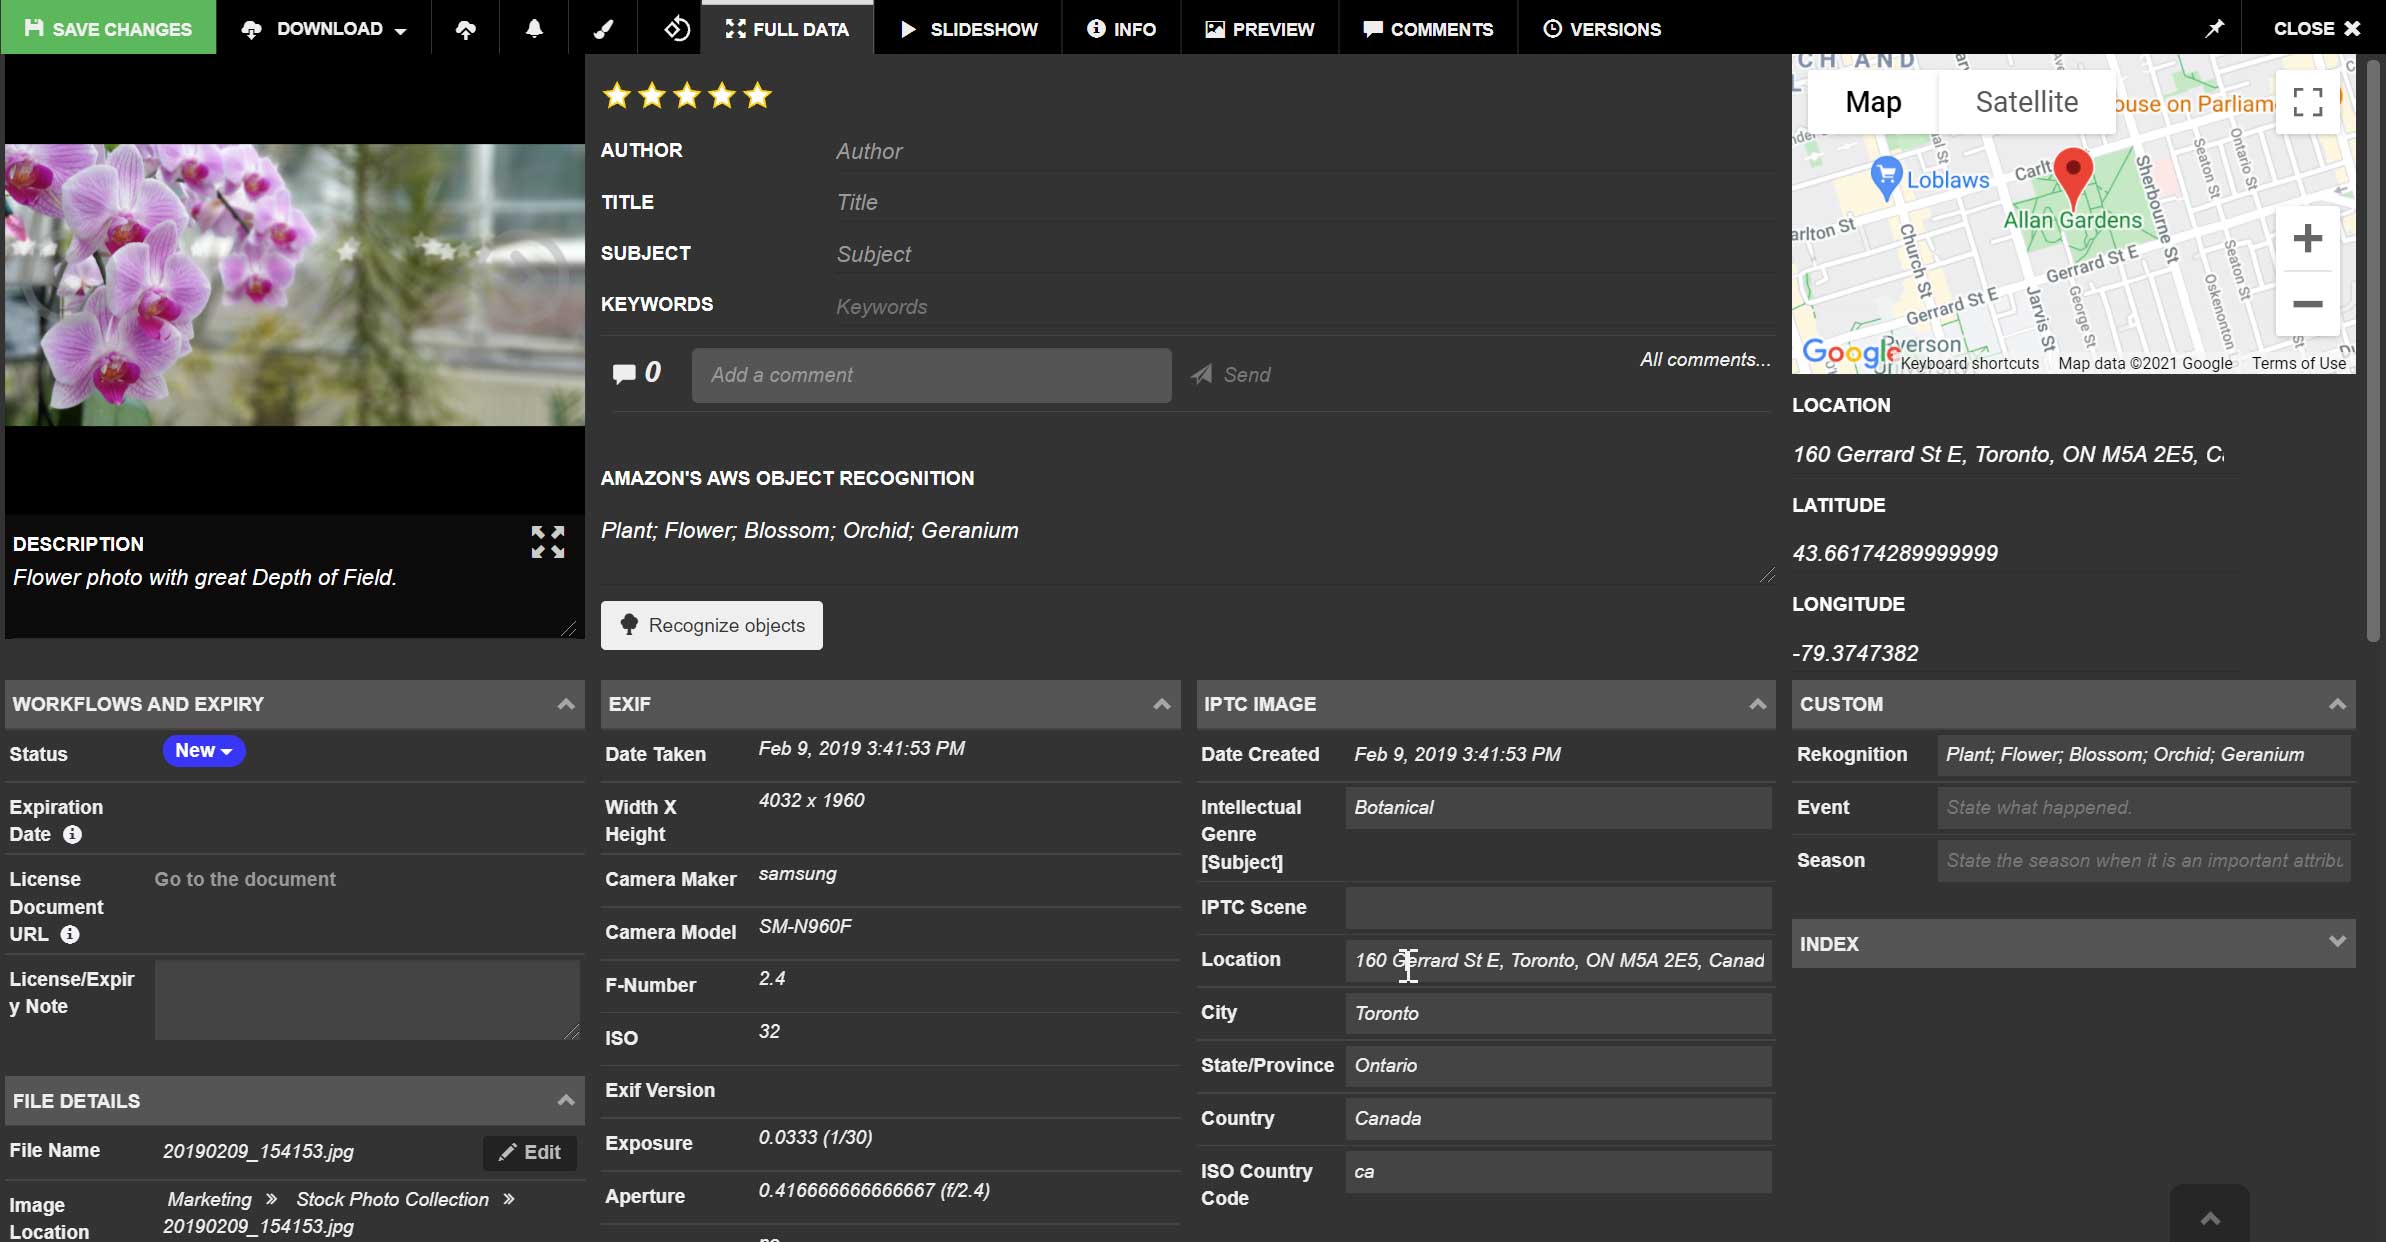
The first step in tagging is to select the image thumb. Once selected, it can be opened in 3 ways: 1) Simply double click that image; 2) Roll the mouse over the thumb and press open; 3) Click on the thumb and press Open from the Actions section of the top menu.
Once an image is opened, the following animation demonstrates the basics of tagging various data fields.
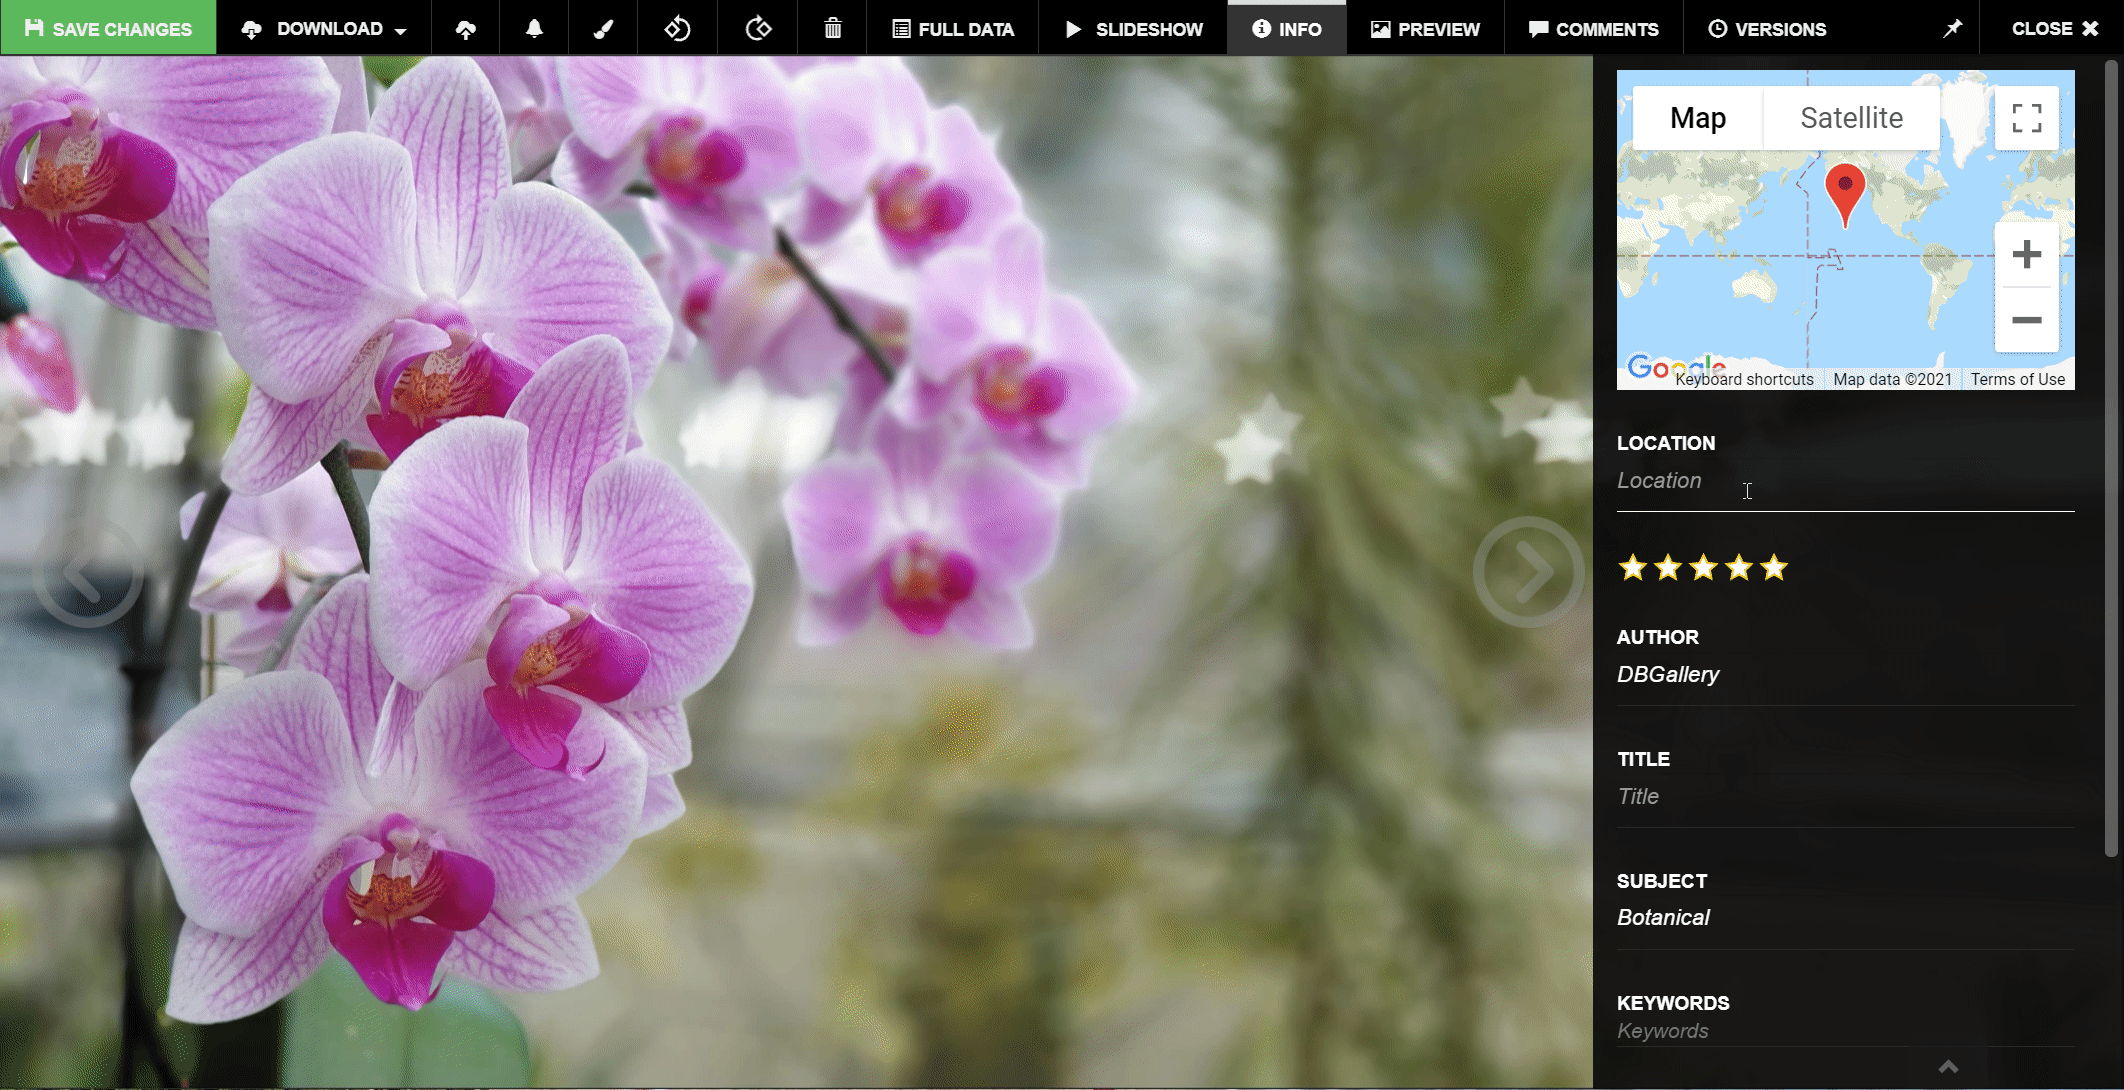
Tagging:
- In Location, just start typing an address or landmark to have Google Maps bring up a list of locations that match.
- Data fields other than keywords and location need to be fully keyed in; there is no dropdown list build into DBGallery. That said, many browsers automatically keep a list of previously keyed entries, so common items such as Landscape for the Subject may show in a dropdown.
- Keywords: They can be selected from the full list of keywords already added. Simply start typing to show keywords which match. If it doesn’t already exist, press the top line in the list + Add “keyword”. (This adding new keywords may not always work if your system administrator has set the ‘Fixed Dictionary’ setting on, meaning no new keywords can be added.)
TIP: After starting to type a word and a list of keywords are shown, use the up and down arrow keys to scroll through the list and press enter to choose that keyword.
TIP: Folder names are included in searches. If images are in a folder such as \\photos\Europe\Jan 2022 there is no need to tag images with Europe.
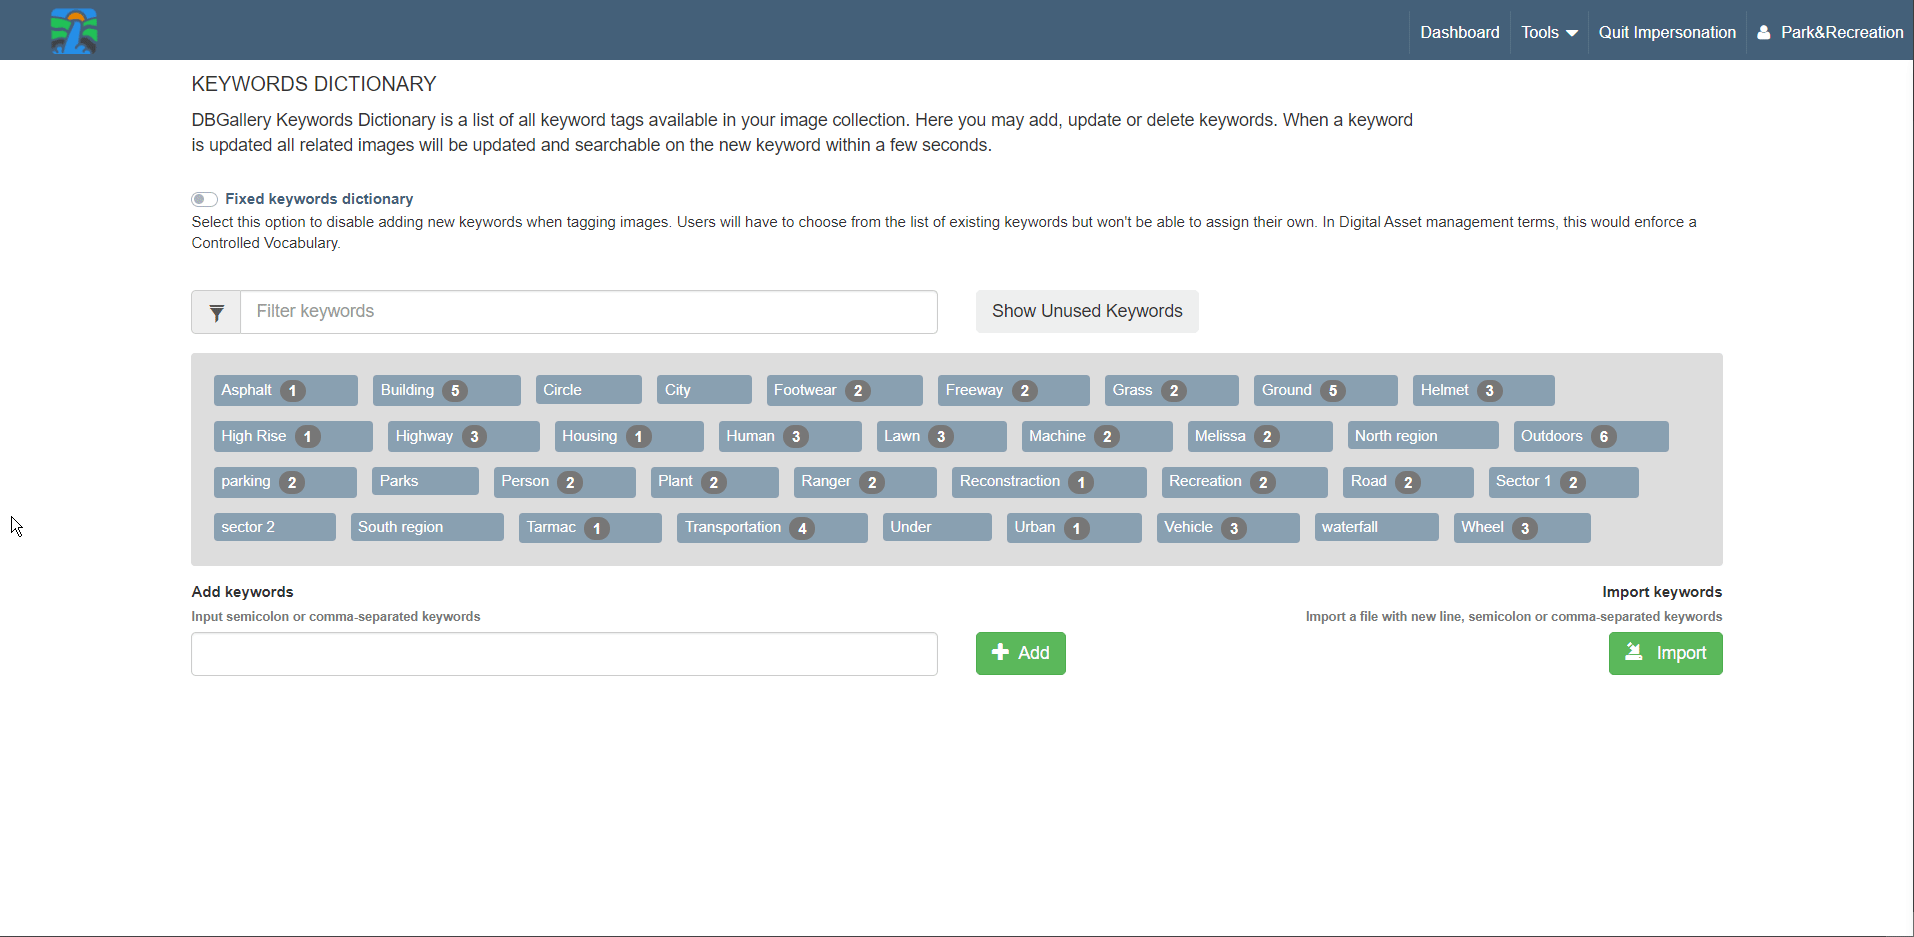
Keywords may be renamed, deleted and added in the Keywords Dictionary. It is a great place to maintain the overall keyword list, and perhaps even more importantly, fix incorrect keywords. The appropriate system permission is required to access the Keywords Dictionary.
Using the Thumbs Bar
TIP: Use the little up arrow near the lower right corner to show the thumbs bar…and from there click the thumb of the image to edit rather than going back to the previous page to select the next image it tag. The thumbs bar includes all thumbs shown in page where you came from (Usually the Gallery View where you selected a folder or performed a search).
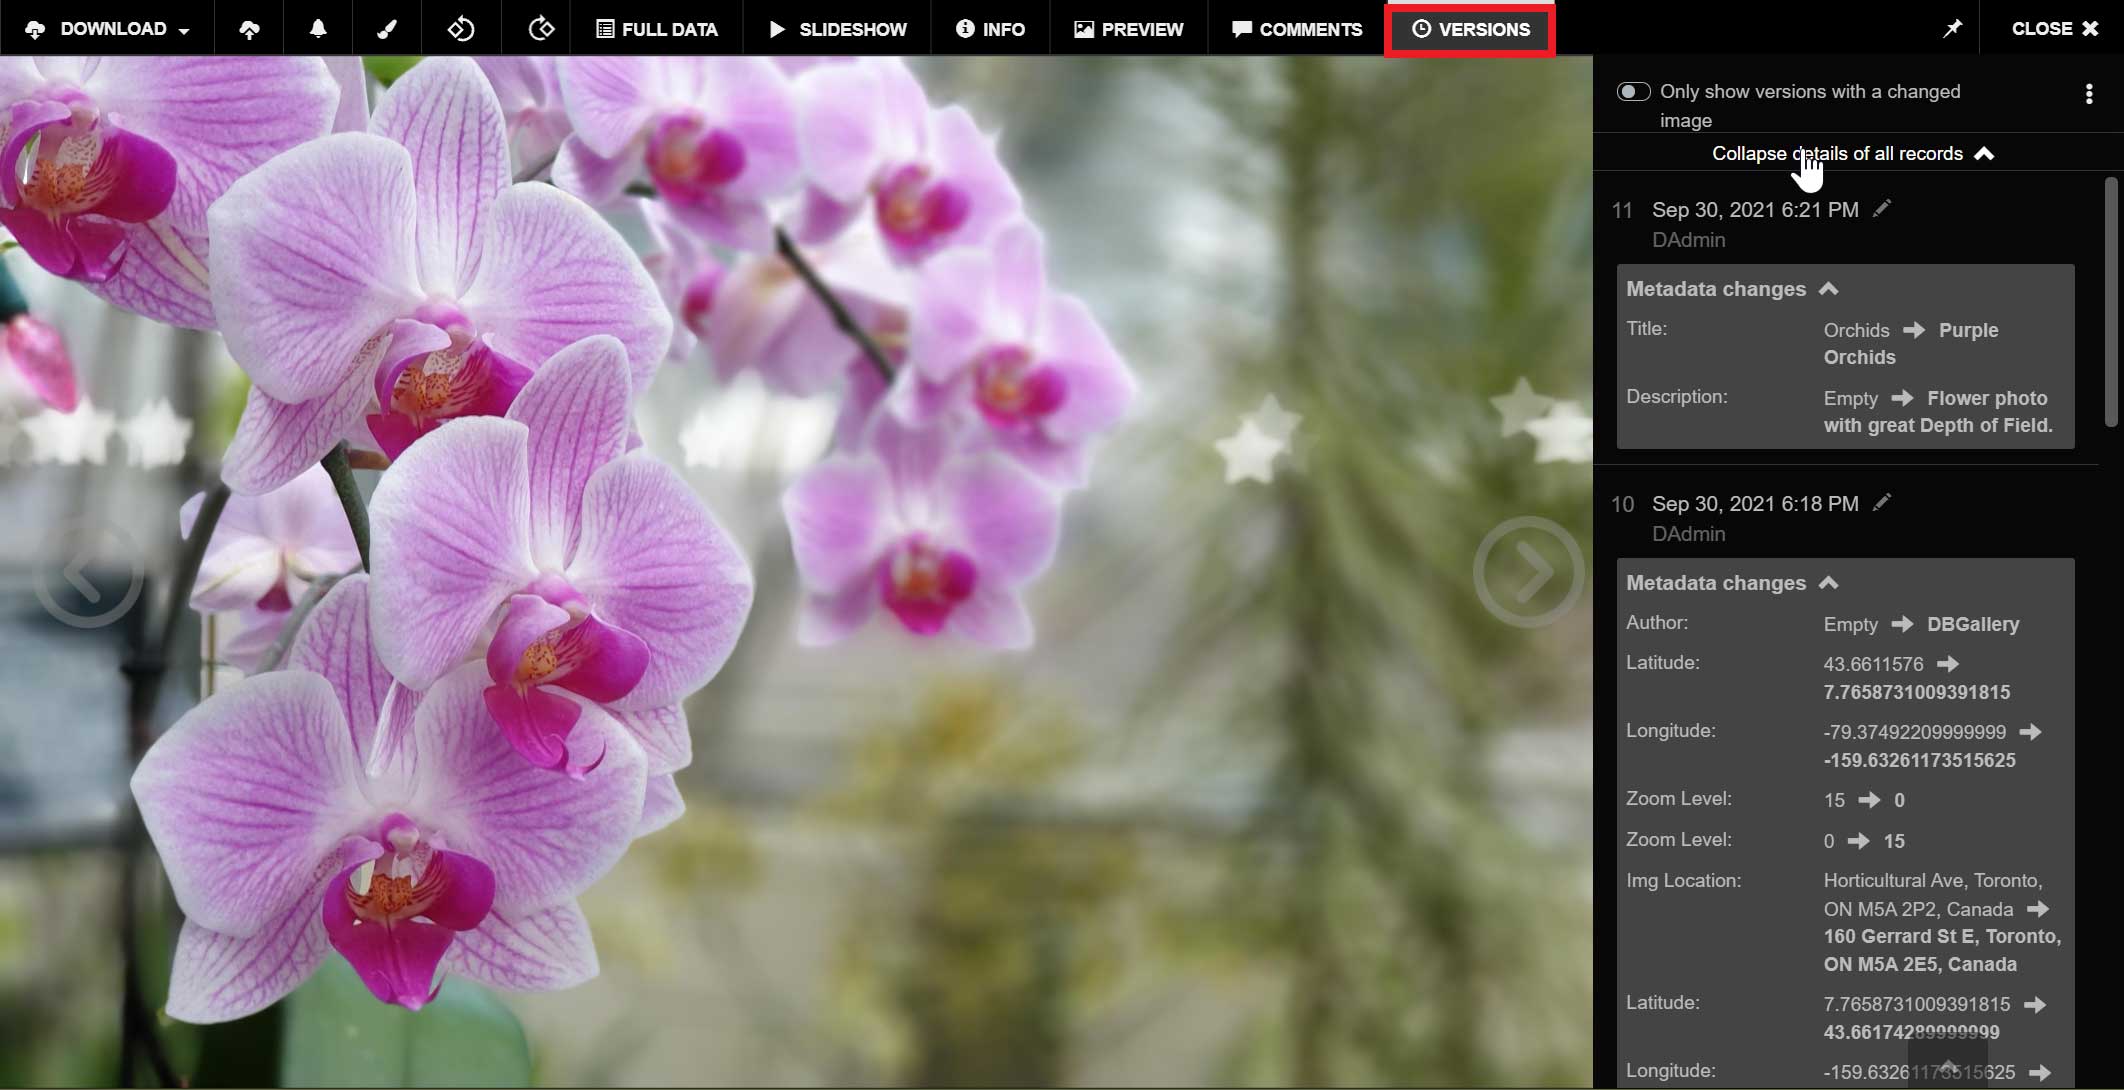
Reviewing Previous Data Changes To review previous changes to an image, go to the Versions panel. It will show all data edits as well as any previous version of the image.
By default, previous metadata updates are not shown (only previous image versions are). For a clear list of metadata edit, deselect “Only show versions with a changed image” and also “Expand details of all records”.
Tagging Multiple Images
Tagging many images, or editing their data, at once is by far the most efficient means to tag images.
Take the zoom-in approach: Select all images which have common attributes, such as all those which match a specific project id, or all those taken during a specific photo shot. If all are taken by a specific author or are of the same subject type, select all of them and key that data first. Then zoom into less common factors, such as all those that have a smile in them. Only then would single images be tagged with attributes speicific to only that one image.
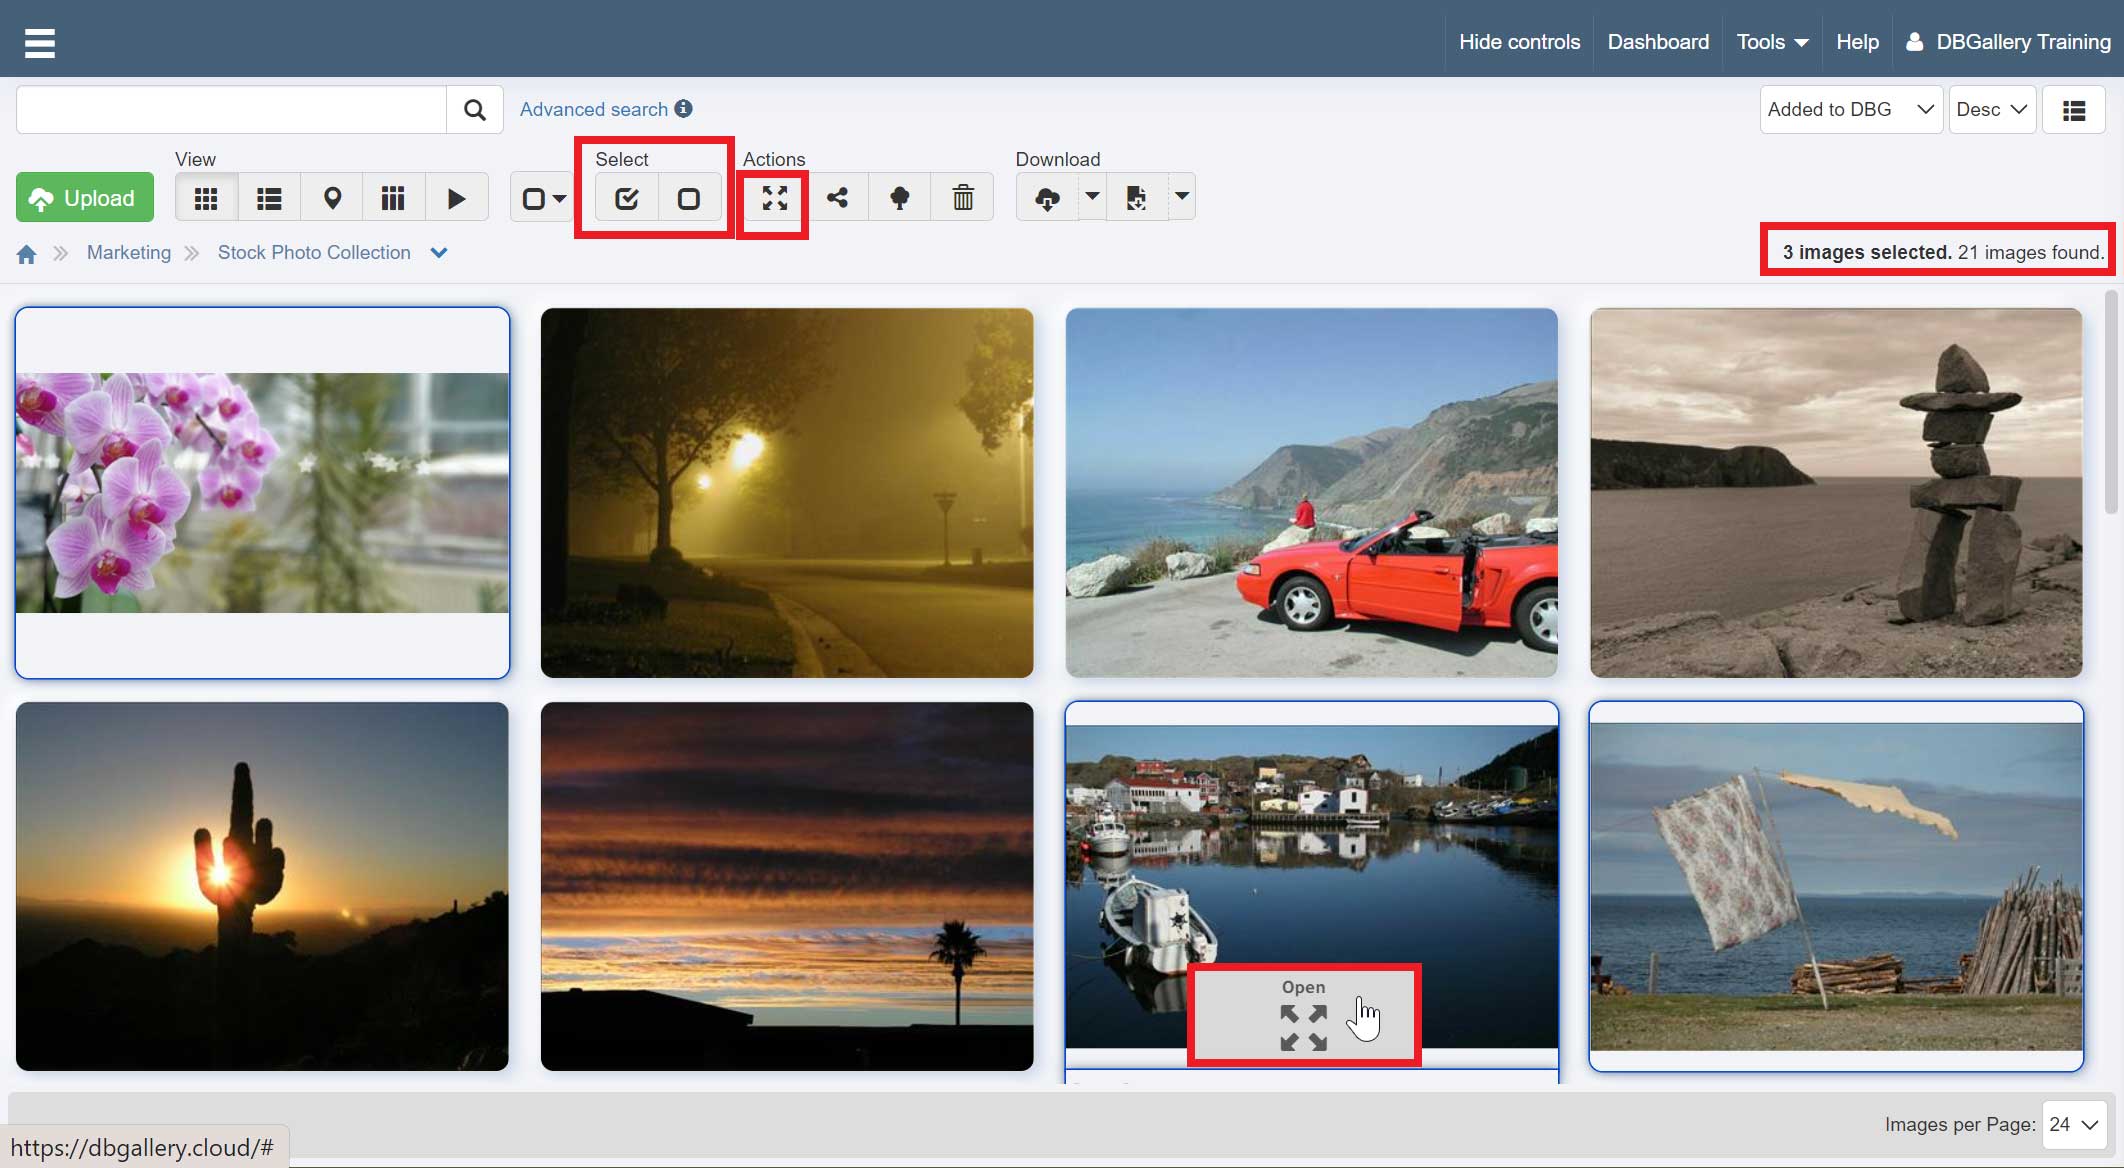
Start by selecting any number of thumbs. Do so by using the Shift and Ctrl/Cmd keys while clicking the thumbs.
Opening them is the same as with a single image: 1) Double click any selected image; 2) Roll the mouse of a selected thumb and press open; 3) Press Open from the Actions section of the top menu. Also note the Select All and Select None buttons in the Select section of the top menu. To deselect images, single click any image which is not selected. Or press the Select None button in the Select section of the top menu.
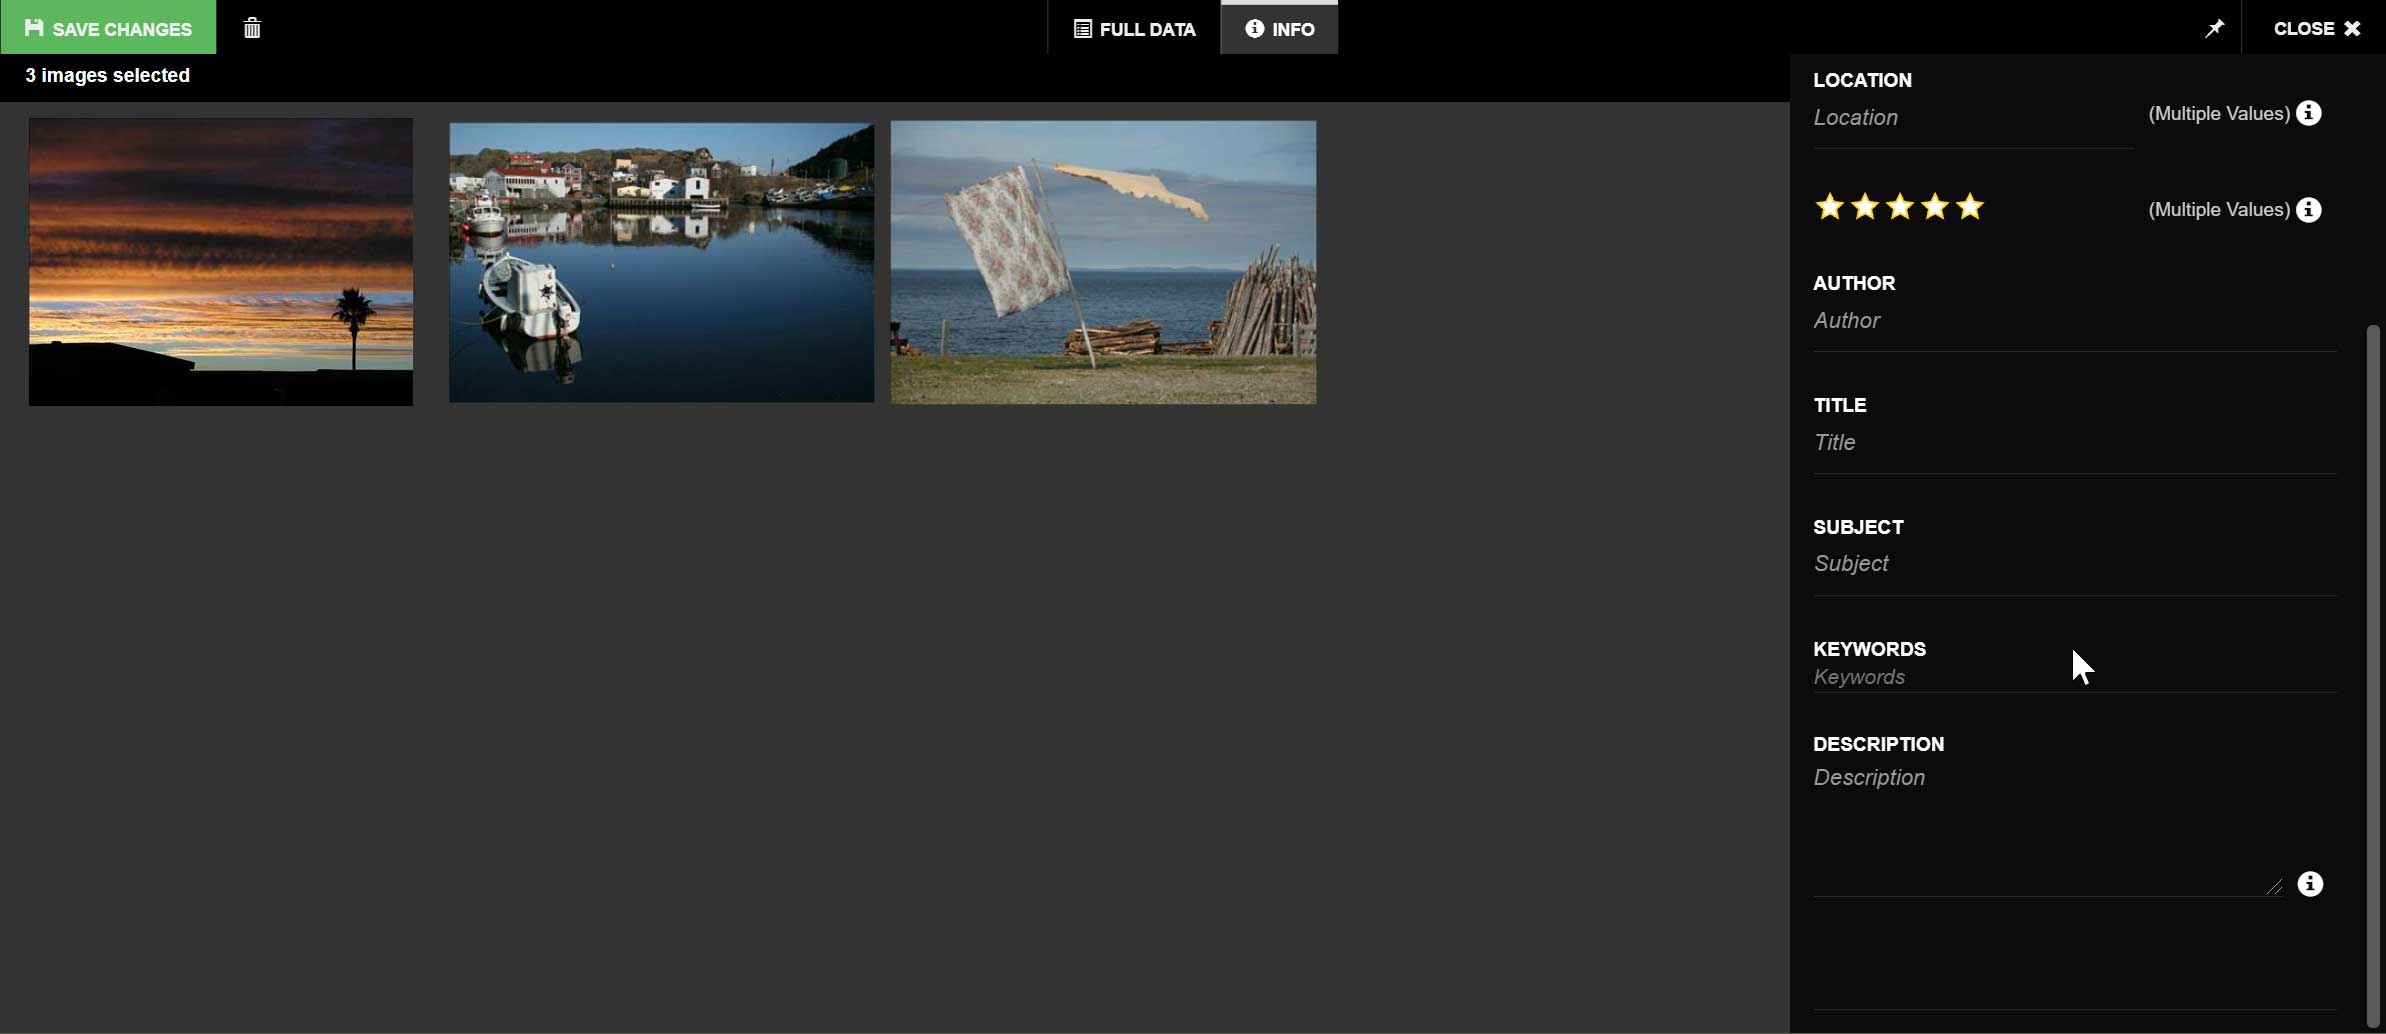
The editing of multiple images is much the same as with a single image. (Although when there is existing data it can get more complex…see “When there is existing data” below.)
If there are thumbs on the left side which were selected by mistake or don’t belong for some reason, clicking the thumb will remove it.
Seeing ALL the data: Full Data View
To see absolutely all data for a single, or multiple images, select the Full Data panel from the top menu.
When there is existing data
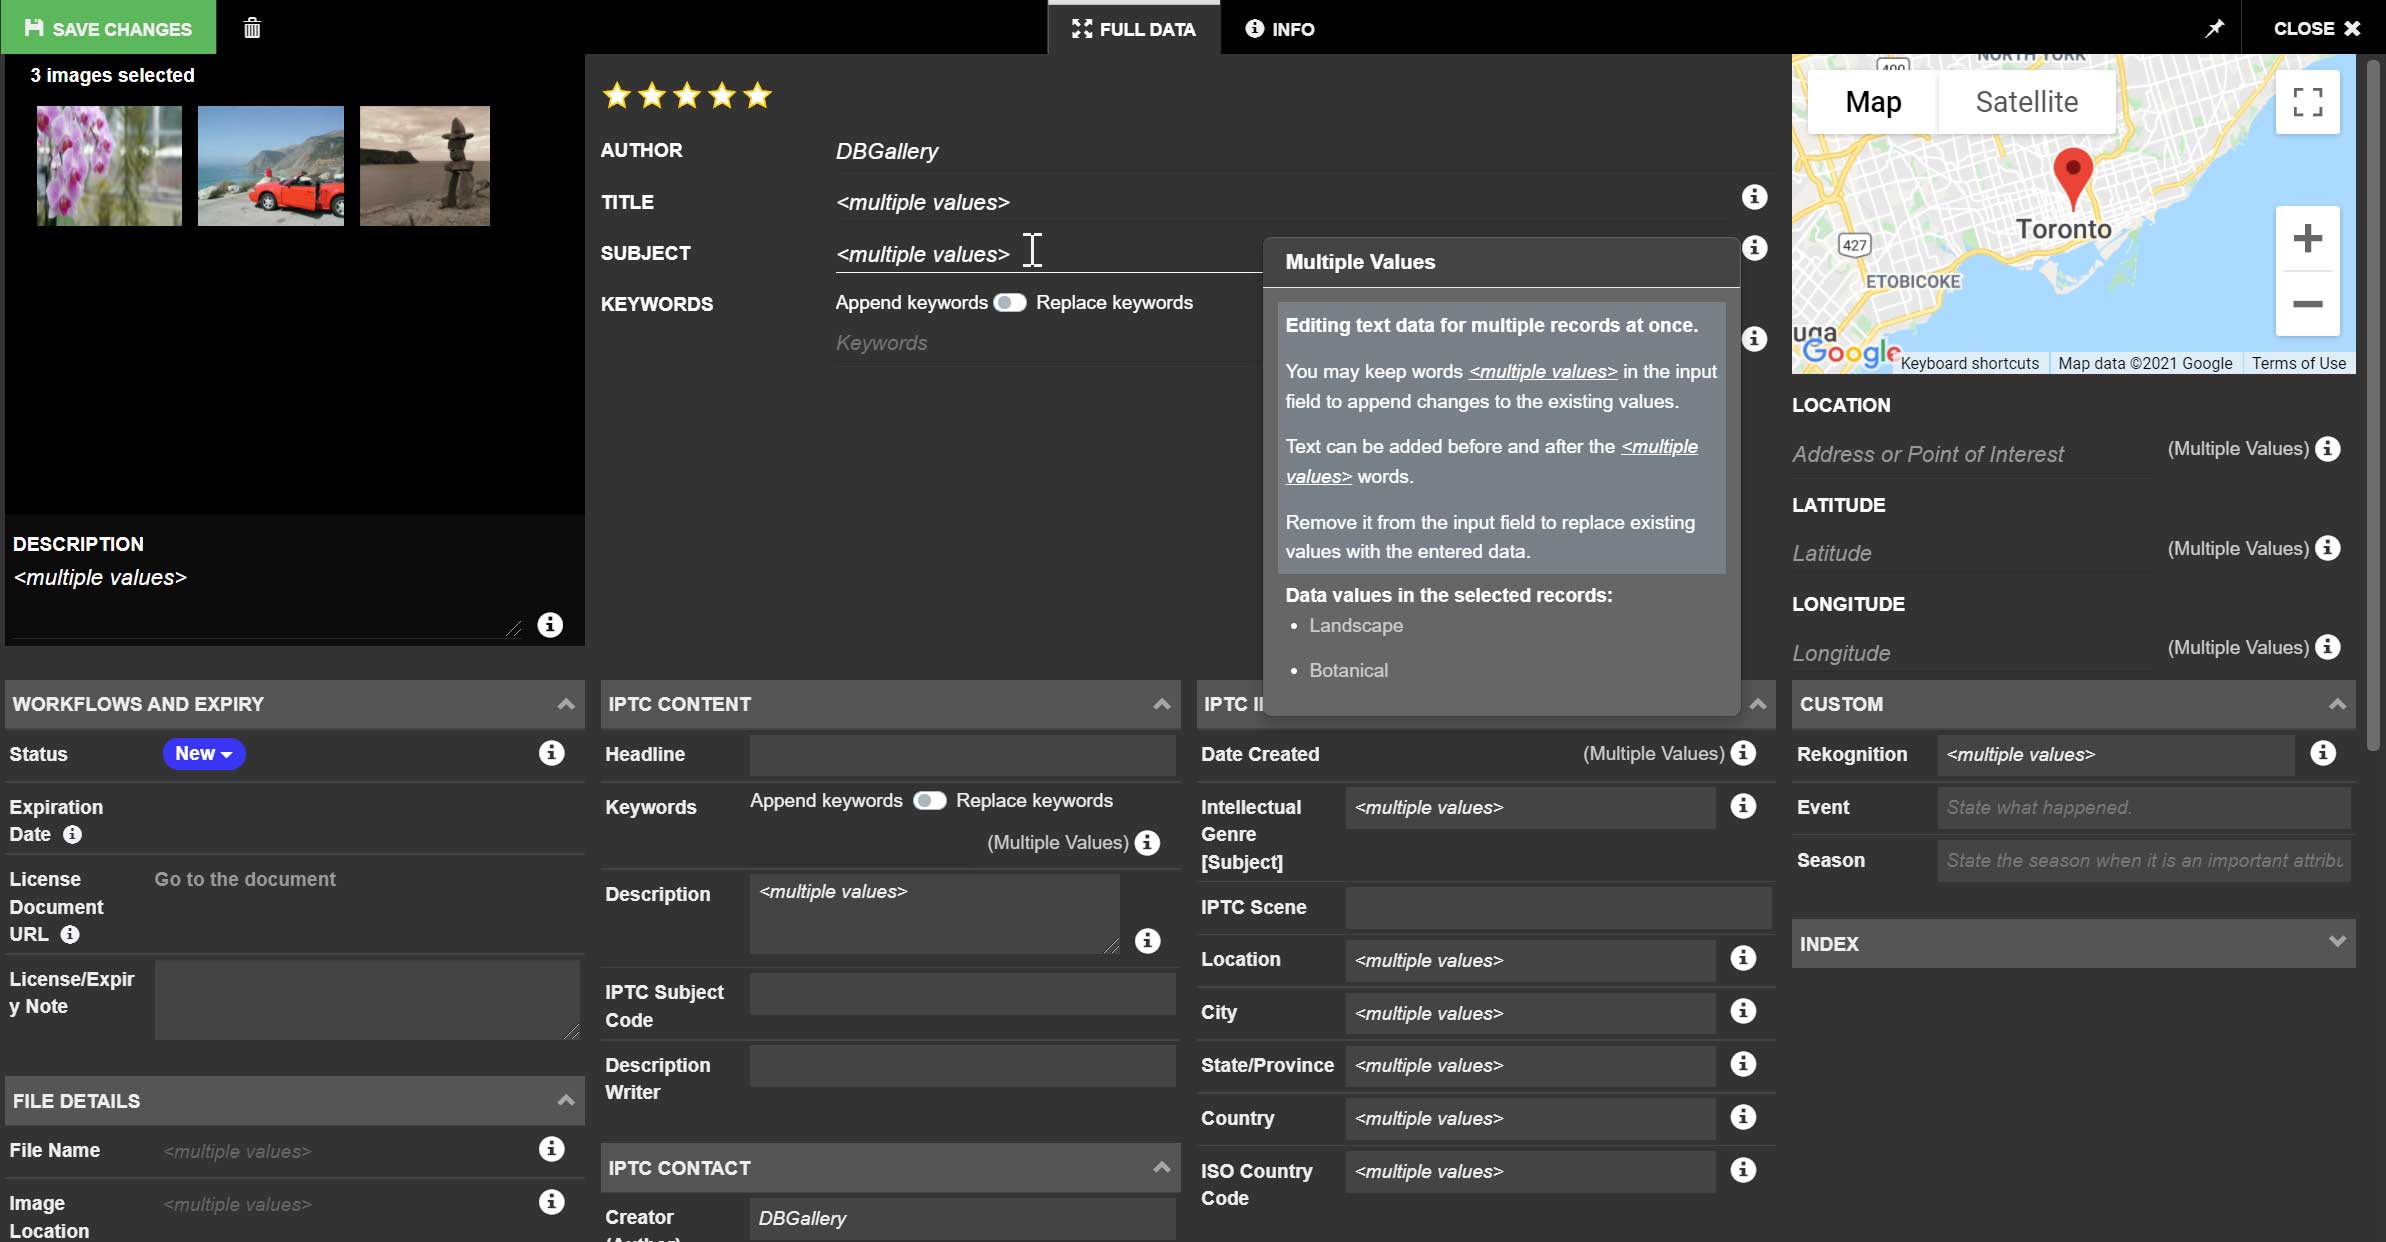
Editing multiple images when there is existing data is handled really well in DBGallery, but it is a little complex. As shown in the Multiple Values popup below:
- Keep the words
in the input field to append changes to the existing values. Anything typed after it will be added. E.g. London, or ; Landscape. - Text can be added before and after the
words. - Remove
from the input field to replace existing values with newly entered data.
An exception to the above is keywords. Simply add keywords and they will be automatically appended. Or toggle the Replace Keywords button to have all existing keywords replaced with those being entered.
Press the i circle next to any data field which has
Recommendation: Choose a couple test images to play with, editing keywords and other fields when there is existing data for each of the images. It turns out to be very simple once it’s done a couple times.
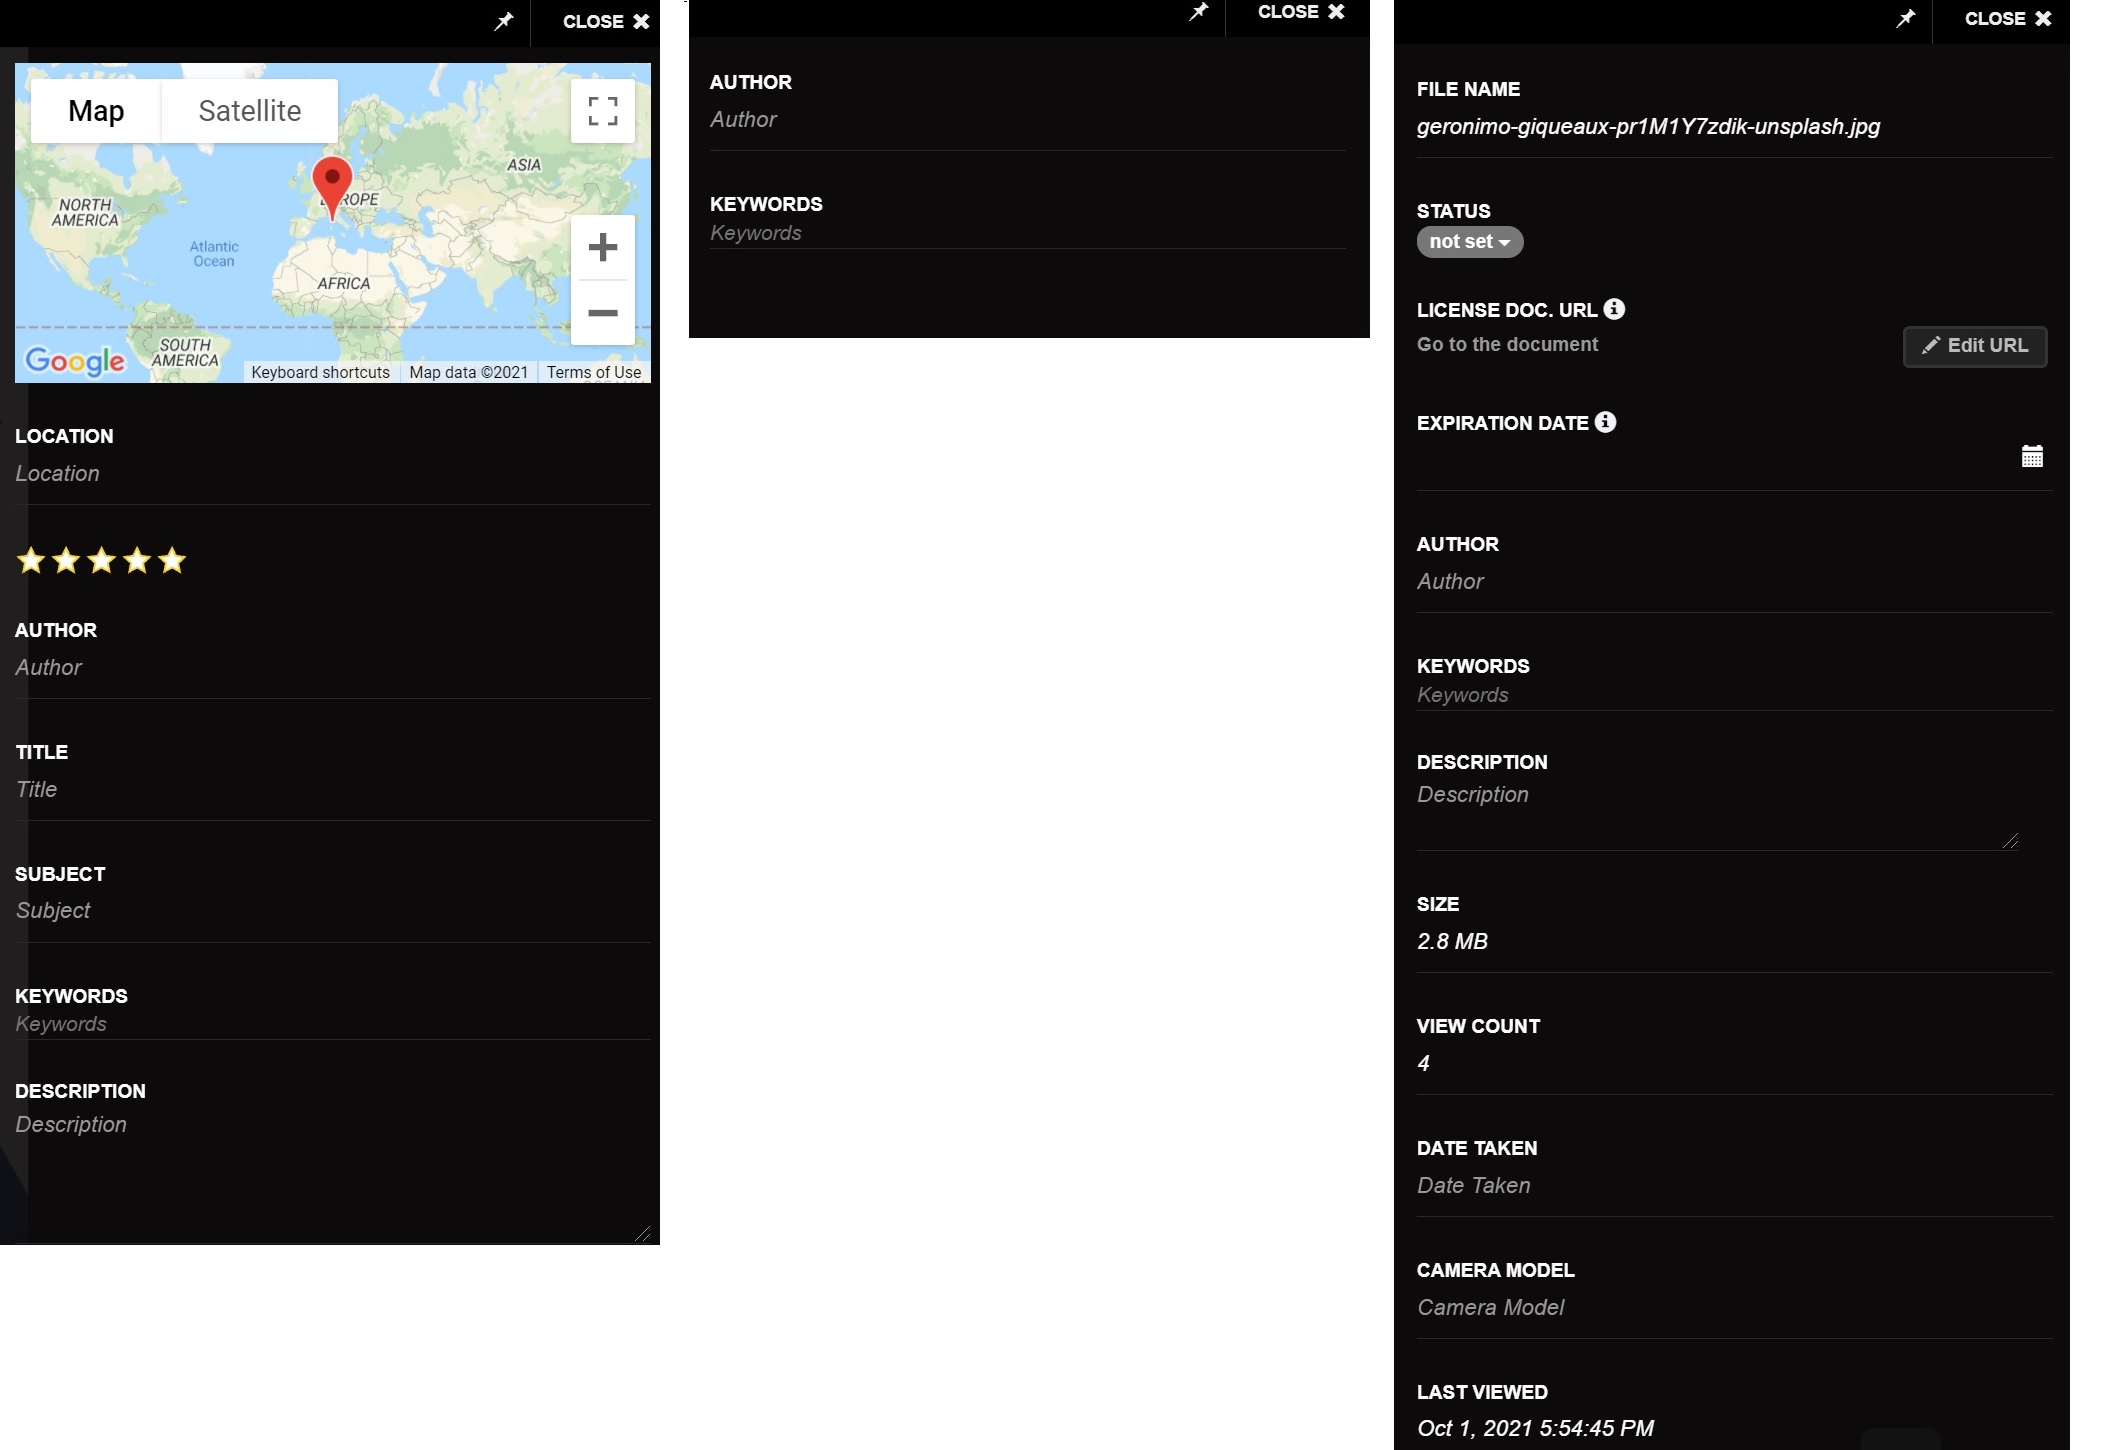
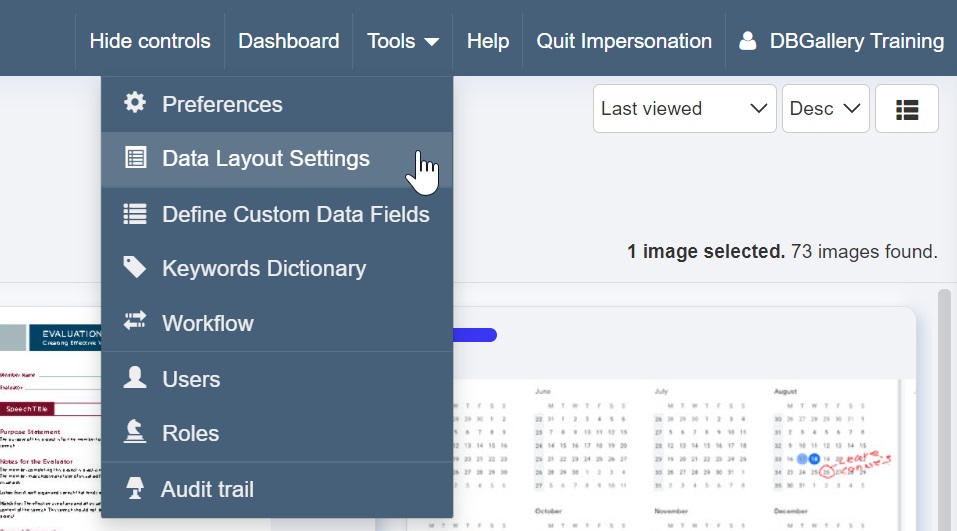
Changing the Data Layout
The data fields shown in either the Full Data view, or the simpler Info view, may be changed and ordered in Data Layout Settings. Change those setting from the Tools - Data Layout Settings in the main DBGallery menu.
Data Layout for the Info panel can range from just a couple fields to a high number of them, as shown in these three examples below. The top half of the Full Data panel may also be similarly customized.